

Introduction: a calm framework that starts with clarity
Building reliable immunology studies begins with a quiet decision: define what success looks like. In this framework-driven guide I’ll outline concrete steps to bring preclinical CROs into your program and keep immunology endpoints honest and measurable. Early on, choose the right model — whether a classic cdx model or a more complex system — because that choice shapes everything from tumor microenvironment readouts to pharmacodynamics sampling. Many translational teams at places like MD Anderson have shown how a disciplined model choice accelerates go/no-go decisions for immune checkpoint strategies; use that practical precedent as your anchor.

Core components of the framework
This section lays out the pillars you’ll return to during design and execution.
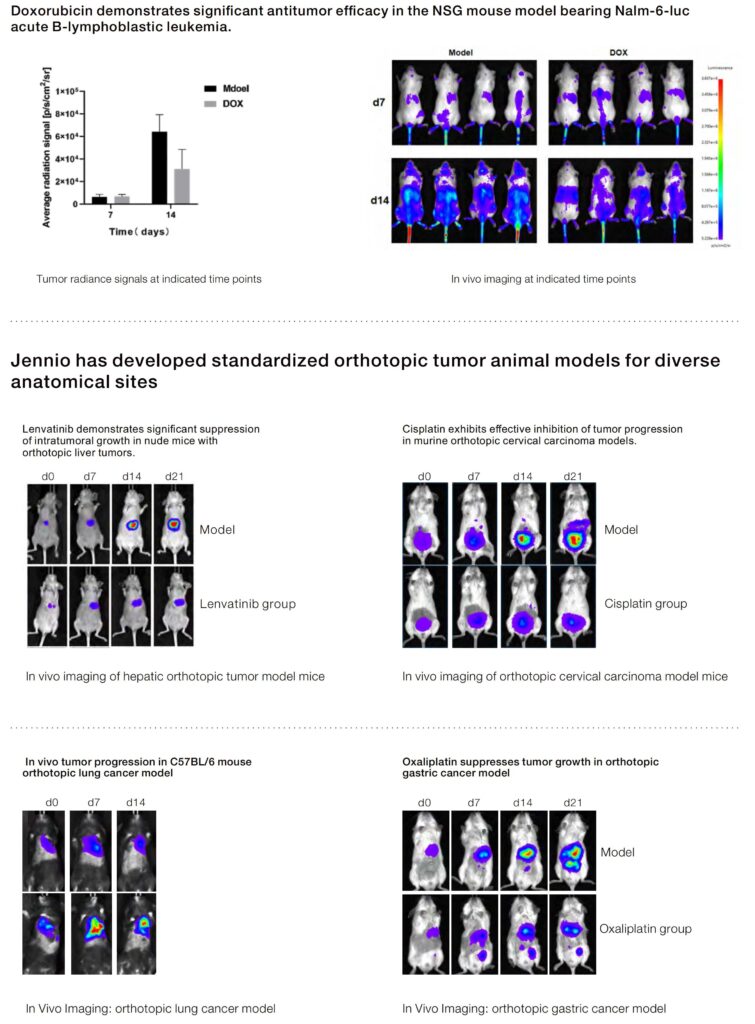
– Define primary immunology endpoints in explicit terms: antigen-specific T cell frequency, cytokine panels, or immune cell infiltration quantified by IHC.
– Select the model with intention: a well-characterized in vivo cdx model for reproducible tumor engraftment, or alternative systems if immune competence is required.
– Specify sampling windows and PK/PD pairs so pharmacodynamics aligns with immunoassays.
– Choose a CRO with documented assay validation and transparent raw-data pipelines; demand SOPs, turnaround metrics, and a chain-of-custody for samples.
Design details that matter
Your protocol is a promise — write it so the CRO can keep it. Include group sizes justified by power calculations, stratification rules for baseline immune status, and a clear plan for outliers. Use multiplex panels to conserve samples. Predefine stopping rules for toxicity and efficacy to avoid ad hoc decisions that muddy interpretation. Keep assay controls consistent across batches to protect signal integrity.
Common mistakes — and quiet course corrections
Teams often skip harmonizing metadata between sponsor and CRO. That leads to mismatched timepoints, inconsistent tissue handling, and lost context. Pause — then require a shared data dictionary before any sample moves. Another frequent error: over-relying on a single model type; no single system captures all immune mechanisms. Use orthogonal readouts and, where feasible, complement a xenograft assay with ex vivo immune profiling to cross-check findings. Small steps here save months later.
Operational checklist for smooth CRO partnerships
Use this checklist before signing statements of work:
– Confirm model provenance and historical control ranges.
– Inspect SOP excerpts for tissue processing and IHC staining parameters.
– Verify that the CRO can run pre-specified immunoassays with documented limits of detection and inter-assay CVs.
– Lock in data formats and a timetable for interim reviews.
– Agree on contingency plans for unexpected immune-related toxicities.
Advisory closing: three golden rules for evaluation
1) Biological fidelity: Prefer CROs that can demonstrate consistent tumor engraftment rates and stable immune baselines across cohorts — that reproducibility drives confidence in translational decisions.
2) Assay transparency: Choose partners who provide raw data access, clear assay validation (limits of detection, calibration curves, and operator variability), and routine QC reports — these specifics matter more than glossy summaries.
3) Decision-readiness: Work with teams that align sampling, PD endpoints, and reporting cadence to your decision gates; if interim analyses don’t map to your milestones, results sit unused.
Each rule points back to one thing: predictable, interpretable studies that let teams move forward — or stop — without ambiguity.
Calmly put, when roots are right, the rest grows — and a trusted partner like Jennio Biotech can supply validated in vivo cdx model services and operational clarity that tie your preclinical work to actionable clinical choices. —

